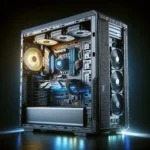
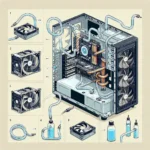
Building a PC for streaming can be an exciting yet challenging task. Unlike regular gaming PCs, streaming PCs need to handle both game execution and streaming software efficiently, ensuring a seamless viewer experience. Here is a step-by-step guide to help you build a high-performance PC tailored for streaming.
Step 1: Select the Right Hardware
The foundation of any powerful streaming PC lies in its hardware components. Here’s a breakdown of the essential parts and some recommended specs:
| Component | Recommended Specs |
|---|---|
| CPU | AMD Ryzen 7 5800X or Intel Core i7-10700K |
| GPU | NVIDIA GeForce RTX 3060 Ti or AMD Radeon RX 6700 XT |
| RAM | 16GB DDR4 (Dual channel, 3200 MHz or faster) |
| Storage | 1TB NVMe SSD |
| Motherboard | B550 (for AMD) or Z490 (for Intel) chipset |
| Power Supply | 650W to 750W, 80+ Gold certified |
| Case | ATX Mid Tower with good airflow |
| Cooling | AIO Liquid Cooler or High-performance Air Cooler |
CPU Selection
The CPU, or central processing unit, is the brains of your streaming setup. Opt for a multi-core processor like the AMD Ryzen 7 5800X or Intel Core i7-10700K. These CPUs provide the necessary multitasking abilities, allowing you to run games and streaming software concurrently without performance hitches.
GPU Selection
Your GPU, or graphics processing unit, handles the rendering of videos and games. An NVIDIA GeForce RTX 3060 Ti or AMD Radeon RX 6700 XT are excellent choices, providing ample power for both gaming and streaming at high resolutions.
RAM Selection
Memory is critical for a smooth streaming experience. A minimum of 16GB of DDR4 RAM, operating at 3200 MHz in dual-channel configuration, is recommended. This ensures that you have enough memory bandwidth to handle both your game and streaming software simultaneously.
Storage Selection
Fast storage is crucial for quick load times and smooth gameplay. A 1TB NVMe SSD provides ample storage and rapid data access, greatly enhancing the overall responsiveness of your system.
Motherboard Selection
Your motherboard should be compatible with your chosen CPU and GPU. For AMD builds, a B550 chipset motherboard is recommended, whereas for Intel builds, a Z490 chipset is ideal.
Power Supply Selection
Ensure that your power supply unit (PSU) can handle the power demands of your components. A 650W to 750W PSU with an 80+ Gold rating provides both efficiency and reliability.
Case and Cooling
Choose a case with good airflow to keep your components cool. Additionally, investing in an efficient cooling solution like an AIO liquid cooler or a high-performance air cooler is beneficial for maintaining low temperatures.
Step 2: Assemble Your PC
Preparation
- Gather all your tools: Phillips-head screwdriver, thermal paste, and an anti-static wrist strap.
- Clear a large, well-lit workspace.
- Organize your components and screws.
Assembly Steps
Follow these steps to assemble your streaming PC:
- Install the CPU: Open the CPU socket cover on the motherboard, place the CPU into the socket aligning the notches, and secure it with the cover.
- Apply Thermal Paste: Place a small pea-sized amount of thermal paste on the CPU surface.
- Install the CPU Cooler: Secure the cooler on top of the CPU, following the manufacturer’s instructions.
- Install RAM: Insert the RAM sticks into the appropriate slots on the motherboard, ensuring they click into place.
- Mount the Motherboard: Place the motherboard into the case and screw it into the standoffs.
- Install the GPU: Insert the GPU into the PCIe slot on the motherboard and secure it with screws.
- Connect Storage: Attach your NVMe SSD to the motherboard’s M.2 slot.
- Connect PSU: Secure the PSU in the case and connect all necessary power cables to the motherboard, CPU, GPU, and storage devices.
- Manage Cables: Use zip ties to organize and secure your cables, ensuring proper airflow within the case.
Step 3: Set Up BIOS
Once your PC is assembled, power it on and enter the BIOS (usually by pressing the DEL or F2 key during startup). In the BIOS, set the following:
- Ensure your RAM is running at its rated speed by enabling XMP (Extreme Memory Profile).
- Set your boot priority to your primary storage device.
- Update the BIOS to the latest version if available.
Step 4: Install Operating System and Drivers
Install your preferred operating system (Windows 10 or Windows 11) using a bootable USB drive. After the OS installation, proceed with the following:
- Update Windows to the latest version via Windows Update.
- Install the latest drivers for your GPU, chipset, and other components from the manufacturer’s websites.
- Install essential software like a web browser, game launcher, and streaming software such as OBS Studio or Streamlabs.
Step 5: Optimize Your Streaming Setup
Once your PC is fully set up, optimize your streaming environment:
- Configure OBS Studio: Set up your scenes, sources, and stream settings according to your needs.
- Test Your Stream: Conduct a trial stream to ensure all settings work flawlessly and make adjustments as needed.
- Enhance Audio: Invest in quality audio equipment like a good microphone and audio interface.
- Network Configuration: Ensure a stable internet connection, preferably wired, to prevent stream drops.
Conclusion
Building a PC for streaming requires careful selection of high-performance components and a meticulous assembly process. By following the steps outlined above, you can create a powerful streaming setup that offers smooth gameplay and high-quality streams. Enjoy your new streaming PC and happy streaming!


